If the video player is not working, you can click on this alternative video link.
Advertisement
Fancy making an RC missile launcher? Then, follow this simple guide to find out how.
As you can imagine, you'll need some tools and materials before you get started.
Materials and gear needed
With all the gear and materials ready, it's time to get on with this great little build.
Step 1: Prepare the main anti-aircraft missile launcher chassis
The first step is to take your plastic box. Melt four holes through the sides and one through the lid of the box using your soldering iron. The holes on the side of the box will be used as the main drive wheels, so will need to be two sets of two directly opposite each other.
You may need to expand the holes a little to enable the motors to sit flush with the inside of the box. With that done, position each gear motor in place, and secure it to the box as needed.
Advertisement
Next, take your 10 rpm gear motor and secure this into place through the hole of the lid of the box. This will form the turret maneuvering motor.
You'll also need to cut two slots at the front of the launcher to accommodate the switches.
Step 2: Make the firing caps for the missile launcher
With that done, take your PVC pipe and cut it into a series of small rings of pipe.
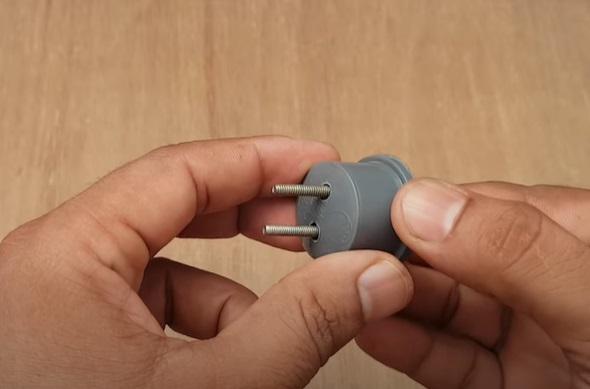
Next, take a spring, and secure a pair of suitably sized bolts to either eye of the spring using a pair of nuts. Rinse and repeat to make a set of ten.
Then, take your plastic caps (to the same diameter as the pipe) and melt two holes in parallel to the same width as the distance between the bolt "prongs" of the springs. Thread the prongs of the springs through the holes in the plastic caps.
Advertisement

Do the same for the other 9 caps and pronged springs. With that done, strip down an old LAN cable and remove each internal wire separately. Coil two wires together and then wrap each wire around each of the prongs on each cap.
Rinse and repeat for all ten of the caps and prongs. These will form the bases of the missile launcher arrays.
Step 3: Make the missile launcher rack
Next, cut a piece of wood 3 and 5/16 inches (10 cm) by 2 and 3/4 inches (7 cm). Drill a hole in the center of one of the longer edges so it can be mounted on the top gear motor on the body of the launcher.
Next, cut another larger piece of wood large enough to accommodate all ten of the missile launcher tubes. Core holes to fit the tubes, and then glue this piece to the launcher motor connection block. It will need to be at a slight angle too.
Advertisement
With that done, cut a series of tubes and insert them into the missile launcher, as needed. Next, cut a series of small rings of a slightly larger bore of PVC pipe, and stick them to the end of each thinner pipe to make a kind of muzzle.
Next, squirt some superglue into the mounting hole of the missile launcher rack, and glue it into position on the top exposed gear motor axle.
With that done, take your firing caps, and secure them in place at the base end of each pipe. Once done, braid the wires together into one larger cable.
Step 4: Paint the anti-aircraft missile launcher
With that all done, take some spray paint and paint the entire piece. Choose whichever color you'd like, but in this case, silver/chrome has been chosen.
Advertisement
Leave to dry.
Next, insert the series of switches to the slits you cut in the lid of the box earlier. With that done, it is time to wire everything up.
Step 5: Complete the wiring
Open up the box to expose all the wiring. Take one of the pairs of each wire from the firing cap and wire them all together. With the other wires, wire these to one of the connectors of each switch.
With that done, take two more long wires, and connect each row of switches in series (5 each) on each wire.
With that done, take the wires from the wheel motors and wire them up to the 3-channel 2.4 GHz wireless module. Then wire up the missile launcher turret motor to the wireless module as well.
Advertisement
With that done, take your battery, and connect the wires from the missile launcher caps and switches as shown in the video. Then close the lid.
With that done, mount some RC car wheels to each axle of the side gear motors as needed.
And with that, your DIY RC missile launcher is now complete. All it now needs is some missile to actually fire.
In this case, some small firework rockets will do the trick. Strip off the main firework tops and load one in each tube. To fire them, you'll need to flick each switch, wait for a second or two, and boom!
If you enjoyed this project, you might enjoy another war-related DIY build. How about, for example, your own cardboard Nerf-style machine gun?
Interesting Engineering is a participant of the Amazon Services LLC Associates Program and various other affiliate programs, and as such there might be affiliate links to the products in this article. By clicking the links and shopping at partner sites, you do not only get the materials you need but also are supporting our website.


